


StoreFront(templatic) adding more fields to product WordPress
- SOLVED
Hi I am using the StoreFront theme from templatic.
I need to be able to add fields to products when necessary.
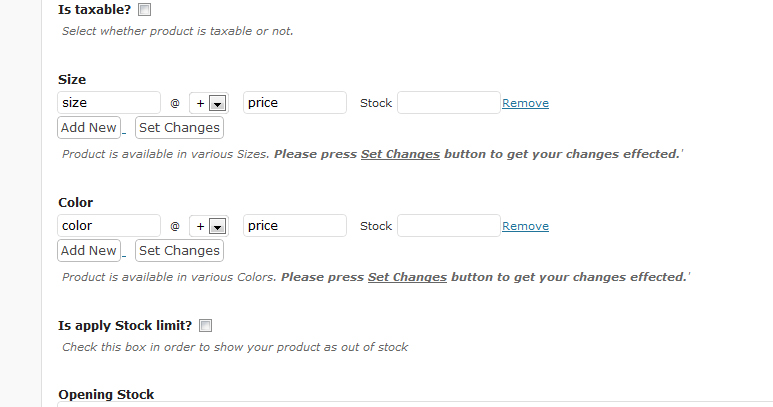
They currently have customfields for products such as size/color that you can set.
I need about 4 more fields I need to be able to add when I want on certain products.
Anyone know how to do this?
Answers (4)

Julian Lannigan answers:
Hi Adam,
I have figured out how to add extra custom fields. It is a multi-part change so get prepared.
<strong>First:</strong> (If you want to provide me the names of each field you wish to add, I will provide you the specific code to add. Otherwise follow below.)
- Navigate to ../StoreFront/library/functions/custom.php
- Insert the following somewhere below the "$meta_boxes = array();" declaration (around line 33) for each field you want:
$meta_boxes['CUSTOMNAME'] =

	array(

		"name" => "CUSTOMNAME",

		"title" => "CUSTOMNAME Title",

		"type" 		=> "select",

		"tabindex"	=>	'2',

		"description" => "Product is available in various Sizes.  Please press Set Changes button to get your changes effected.'"

	);
- Change the "name", "title", and "description" to what you want for each of the fields.
- The key ("$meta_boxes['CUSTOMNAME']") for each field should match the "name".
- Each field requires an equivalent stock field so add the following code for each extra field:
$meta_boxes['CUSTOMNAME_stock'] =

	array(

		"name" => "CUSTOMNAME_stock",

		"title" => "",

		"type" 		=> "hidden",

		"default" 	=> "",

		"tabindex"	=>	'2',

		"description" => ""

	);
- Replace "CUSTOMNAME" with the name of the field. Do this for each field. Change nothing else about the above code.
Ok that part is done. What we just did was added the extra fields to the admin side enabling the ability to edit the fields. This is only half of it.
<strong>Secondly:</strong>
We need to now make the field available to the front end.
- Navigate to ../StoreFront/single.php
- Insert the following around line 11. This will make the correct HTML available to the product_detail.php file.
$product_CUSTOMNAME = $Product->get_product_custom_dl($post->ID,'CUSTOMNAME','','',__('CUSTOMNAME Field'));
- Again replace CUSTOMNAME with the name of the custom field.
- Repeat for each field.
<strong>Thirdly:</strong>
Now we need to actually display the options.
- Navigate to ../StoreFront/library/includes/product_detail.php
- Scroll down to about line 80. You should see "if($product_color)", that is the display for the color field. A little below this you will see "if($product_size)" this is the display for the size field. The size field has a bit more html to it because of the size chart. So I used the color field lines. Copy the following in this file in the order you want the fields to display:
<?php if($product_CUSTOMNAME){?>

<div class="row_spacer"><strong><?php _e('CUSTOMNAME Field');?>:</strong>

	<?php echo $product_CUSTOMNAME; ?>

</div>

<?php } ?>
- Seems WP questions parses the "< strong >" tags in code as well. The part you see as bolded has "< strong >" tags surrounding it.
- Remember to replace the CUSTOMNAME with the actual field name.
<strong>Finally:</strong>
We need to change the javascript to handle the new fields.
- Navigate to ../StoreFront/library/includes/checkout_cart.php
- Insert the following starting at line 17 for each extra field that you wish to be <strong>required</strong>.
if(postformflag)

	{

		if(eval(document.getElementById('CUSTOMNAME')))

		{

			var CUSTOMNAME = document.getElementById('CUSTOMNAME').value;

			if(CUSTOMNAME == '')

			{

				alert('<?php _e("Please select CUSTOMNAME");?>');

				postformflag = 0;

			}

		}else

		{

			var CUSTOMNAME = 0;

		}

	}
Ok that takes care of the required fields, on to the "add to cart" function of the same js function.
- Do a search in this file for "var attstr = '';".
- This is the section of this function that prepares the meta data for the product to be sent to the shopping cart.
- You should see the following:
var attstr = '';

		if(size != '' && color != '')

		{

			attstr = size+','+color;

		}else

		if(size != '' && color == '')

		{

			attstr = size;

		}else

		if(size == '' && color != '')

		{

			attstr = color;

		}
- Add the following below the above code for each field:
if (CUSTOMNAME != '') {

			if (attstr == '') {

				attstr = CUSTOMNAME;

			} else {

				attstr = attstr+","+CUSTOMNAME;

			}

		}
And if you made it through all of that you will have a some extra functioning fields in your theme.

adam b comments:
Hi Julian,
Wow I was close! I am having one issue right now..
The product does not get added to the cart. Can
you think of any reason why this would be happening?
Julian Lannigan comments:
Can you please post this file: ../StoreFront/library/includes/checkout_cart.php
Please do not place it in "< code>" tags. Please use the "image" upload function. (you can upload text files with this function). I am asking because the file is large and it will cutter up this discussion. Thank you!
adam b comments:
Here you go.
It seems like when I add the last bit of code it the cart functionality doesn't work.